Set up custom Profile Conditions that, when met, automatically assign your products to pre-defined Shipping Profiles, giving you more accurate shipping rates at checkout.
Add A Profile Condition
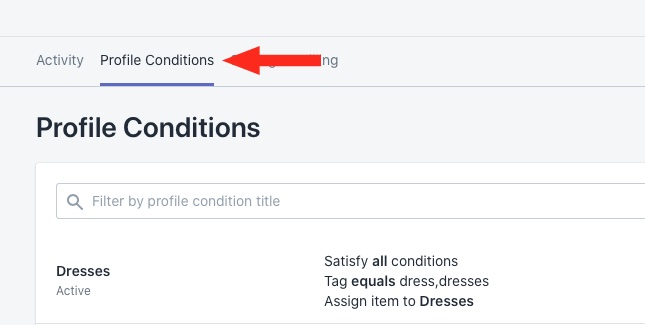
1) Click Profile Conditions on the main menu.
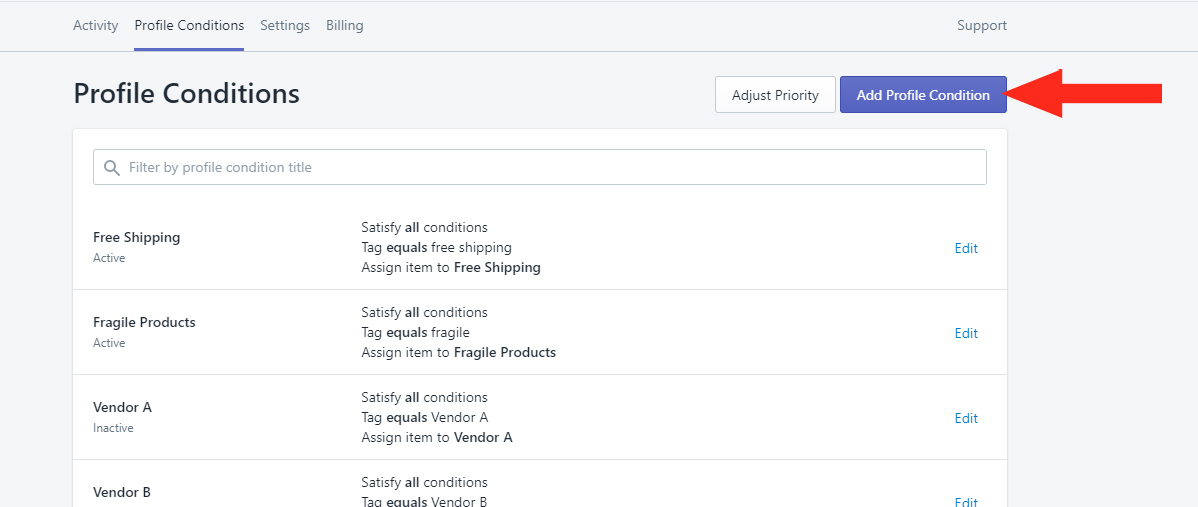
2) Click the Add Profile Condition button.
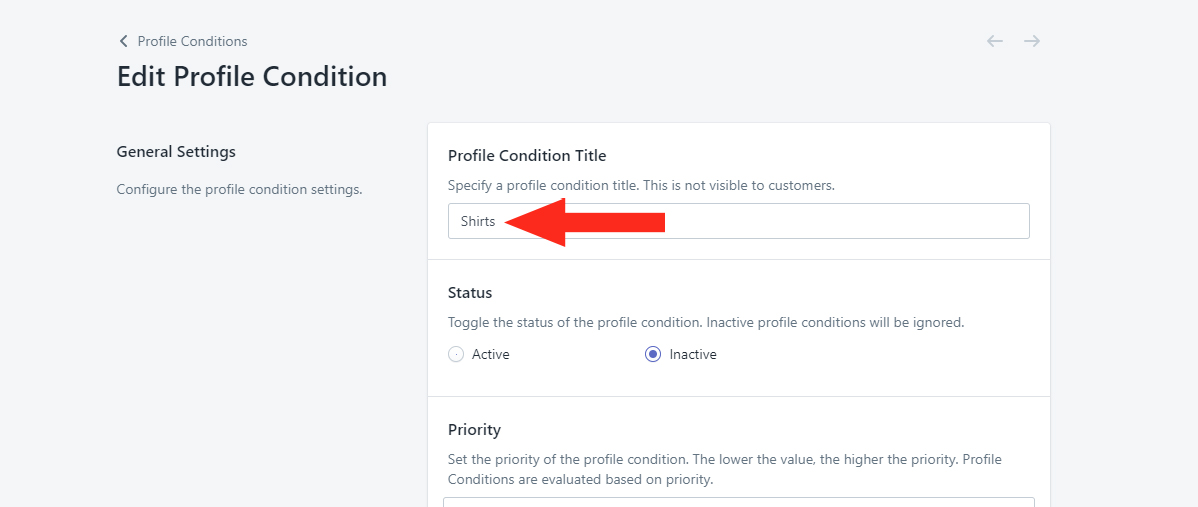
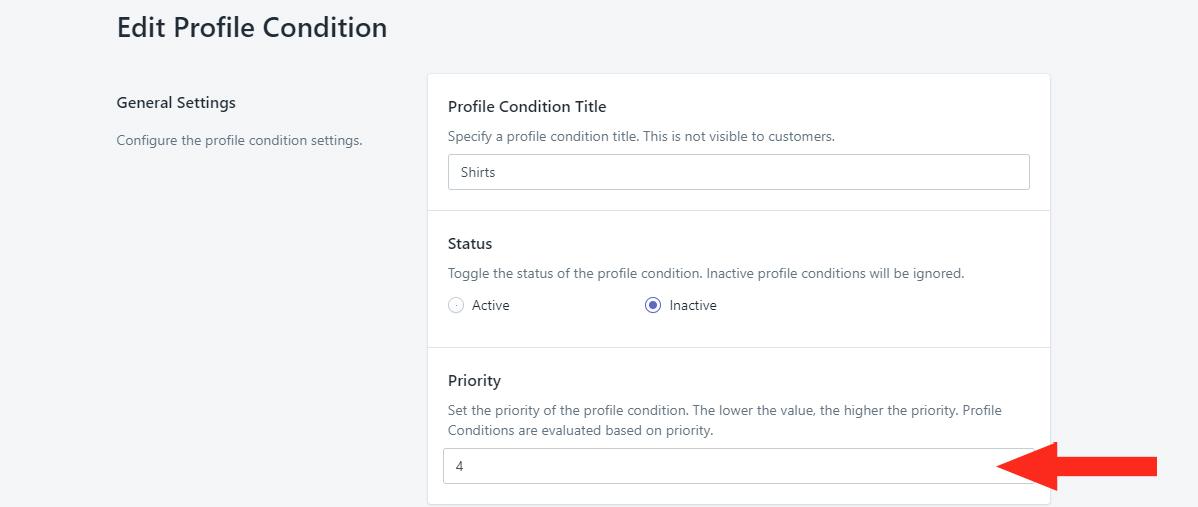
3) Enter a Title for your Profile Condition – e.g. ‘Shirts’
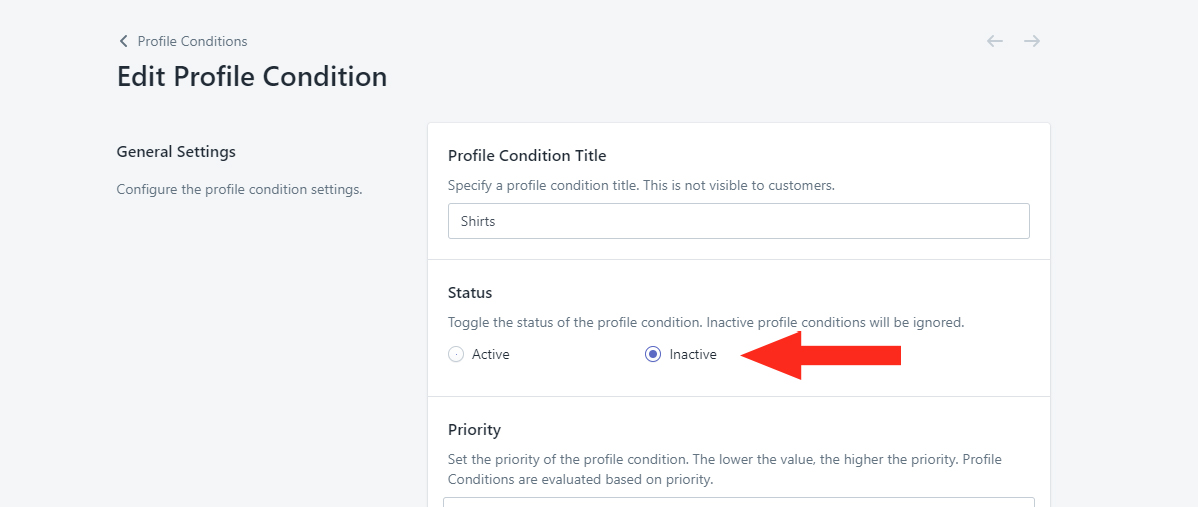
4) Select the Status of your Profile Condition.
5) Set the Priority to be given to your Profile Condition by typing the priority number into the field or by clicking the Up/Down Arrows.
Conditions
1) Select whether All Conditions, Any Conditions, or No Conditions must be met for your Profile Condition to return true.
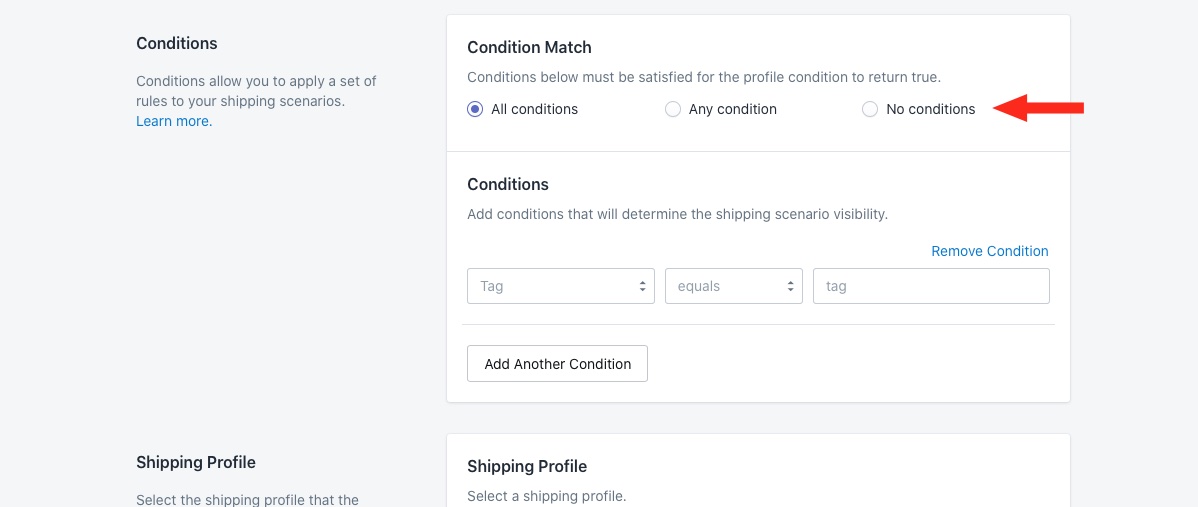
2) Under Conditions, select the Condition type from the drop-down list – e.g. ‘Tag’.
3) Select whether the Condition type Equals or Does Not Equal the Value.
4) Enter a Value for the Condition type – e.g. ‘Shirt’. Multiple values can be separate with a comma – e.g. ‘Shirt, Shirts’.

To add more Conditions, click the Add Another Condition button, then repeat steps 1 through 4 for Conditions.
Shipping Profile
1) Select the Shipping Profile that a product will be assigned to if the Profile Condition (or Conditions) returns true.

Save Your Settings
1) Click the Save button to save your Profile Condition settings.
Edit Profile Conditions
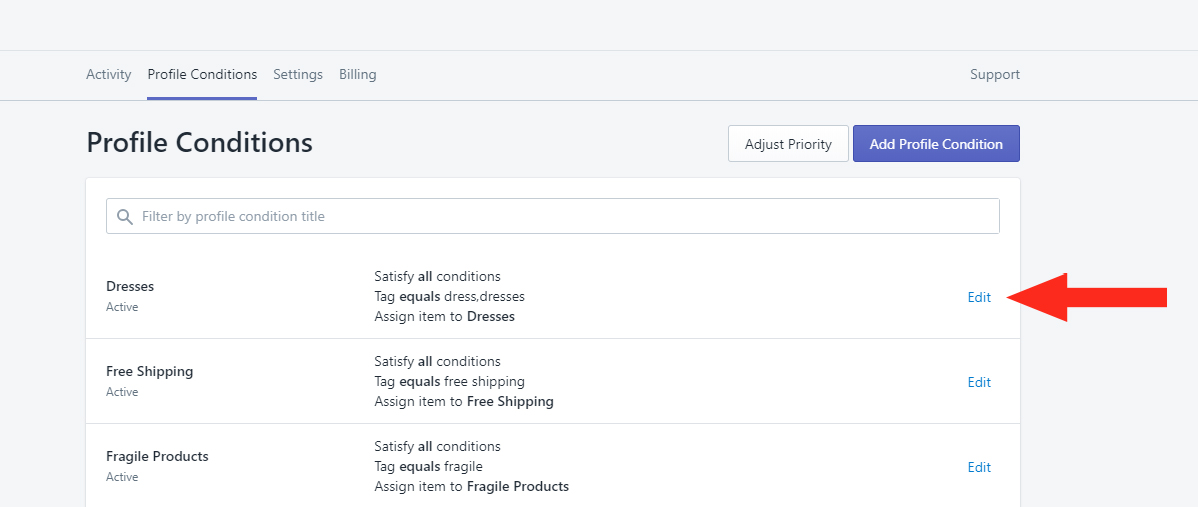
1) To edit existing Profile Conditions, click Profile Conditions on the main menu.
2) Click on ‘Edit‘ beside an existing Profile Condition.
3) Update the Profile Condition Title.
4) Toggle the Status to either Active or Inactive.
5) Update the Priority as needed.
6) Update the Conditions – e.g. ‘Tag’ > ‘Equals’ > ‘Dress’
7) Update the Shipping Profile.
8) Click the Save button to save your updated settings.
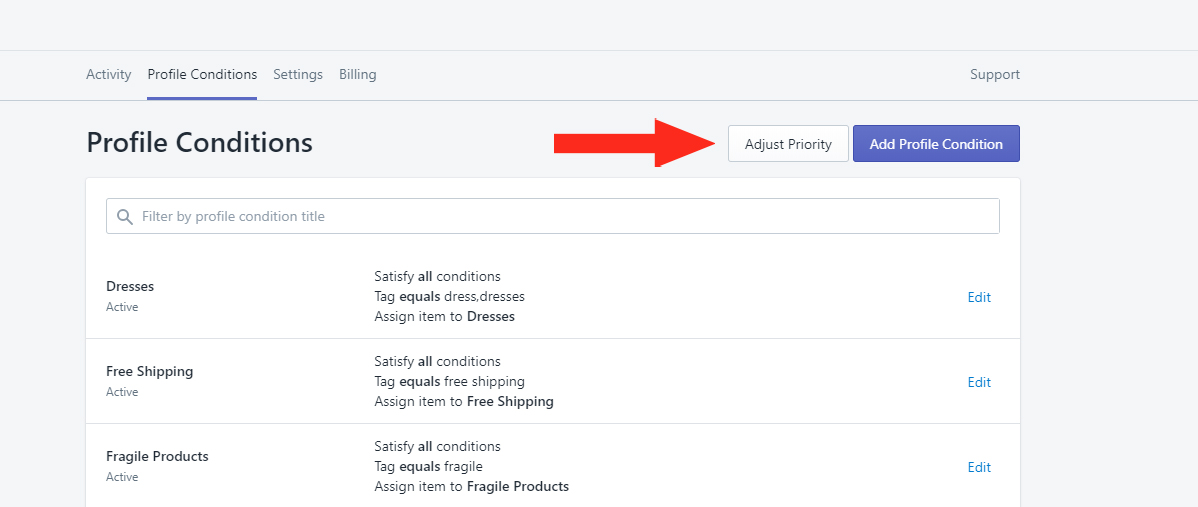
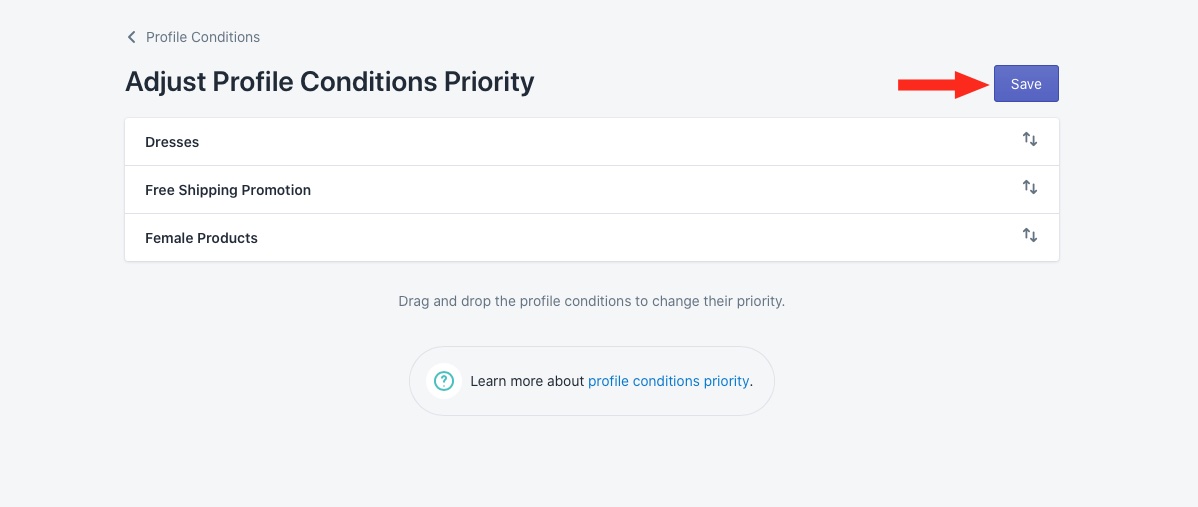
Adjust The Priority
Priorities let you control which Profile Condition takes precedence when a product meets two or more Profile Conditions. You can quickly adjust the priority of each of your Profile Conditions.
1) Click Profile Conditions on the main menu.
2) Click the Adjust Priority button.
3) Manually drag and drop your existing Profile Conditions into the desired order.
4) Click the Save button to save your priority sequence.
Activate Profile Conditions
Each time you set up – or change – a Profile Condition, you must run a bulk update to sync changes to your Profile Conditions. If you do not run a bulk update, any additions or changes you make to Profile Conditions will not take effect and the automation won’t run as expected.